
GlockCNC.com Store
Headstock and Motor Upgrades for Taig Mills & Lathes AND for Sherline Mills & Lathes
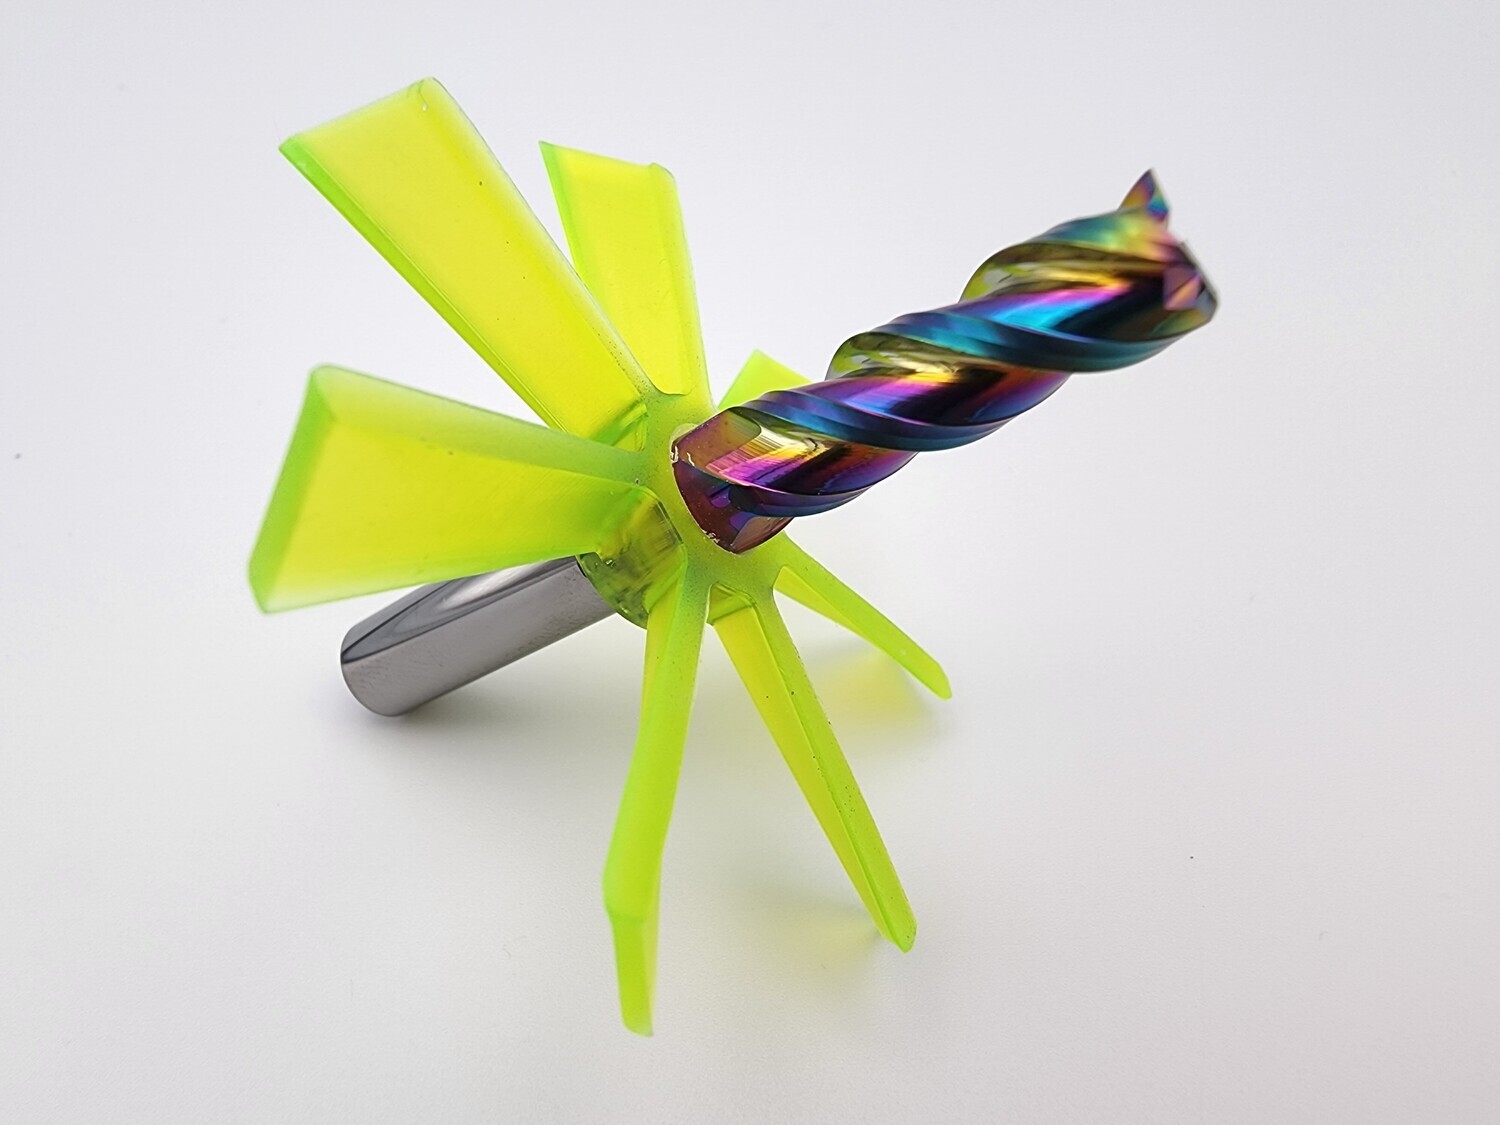
End Mill Chip Clearing Blower Fans - 4 Fans Inch Sizes
A Cheap Super Simple Solution For Clearing & Evacuating Metal Chips (and sawdust for woodworkers)
PRICE IS FOR 4 FANS
Keeping chips cleared out is a key element to long tool life, avoiding chip weld and cuts down on cleanup. You can now clear chips while you cut using our chip blowers...plus, it's a cheap way to do it. They work great for metal or wood. Many types are available; End Mill Fan, ER Fan, BT30 Fan, Tormach TTS Fan and so on. Helpful Hint: To get the best deal, buy them in bunches...because they are so light, adding more to an order doesn't add much to the shipping cost.
Tired Of Chip Weld In Aluminum?
We cut a lot of 6061 and 7075 aluminum here and it's gummy stuff when hot. Mist systems often make a giant fog cloud in the work area and make chips clump. The Fogbuster products are great for cooling, but they don't blow metal chips out like you probably want. The solution...precision 3D resin printed chip blowing fans!
Why We Designed These Fans...
As we started to move production from outside shops to inside production, we ran into some issues. Like mentioned above, it was a problem with chip clearing. Specifically when slotting for our motor mounts and deep boring for our headstock casings. Initially, we were forced to slow down our cuts and would have to occasionally stop cuts when we had a chip weld issue (which messes everything up). Plus, I felt like I had to constantly babysit the mill to blow out chips...and a little on edge about any changes in cutting noise, thinking that disaster was looming. So, I started to look into some solutions such as: 1) use compressed air somehow, 2) try a minimum quantity misting system, and 3) try a fogless coolant system. The last two kept things cool and that helps reduce chip weld, but they weren't great at removing the chips. What did that mean?
It meant we need to prioritize chip removal over coolant. Then I thought...what if I just mounted a blower or fan that would blow the chips out. Yes, an air compressor could do it, but who wants an air compressor banging away in the back ground (plus the cost of electricity). I wanted a simple cheap solution. That's when I started to experiment with fans attached to end mills, indexable cutters and the tool holders themselves. It was pretty much immediately successful. The next step was testing designs. Using an anemometer to determine air velocity and volume we found optimal designs. After that, it was 3D print materials and sizes. The finished product worked great! So great, that we have decided to offer them to our customers.
Fan colors will vary depending and may not be the same color as seen in the image.
Here's A Tip....
To get the best deal, buy them in bunches...because they are so light, adding more to an order doesn't add much to the shipping cost.
How To Install:
The embossed side is the top and cutters or tooling go down through the top. First, use a deburring tool to remove any extra "lip" on the bottom of the fan's internal ring...it will make things easier. That lip forms as part of the 3D resin printing process. You may also notice a similar lip on the fan blades. The fan blade lip doesn't seem to affect the performance to any real degree...I just leave them there. These are designed to fit very tightly. It's easiest to use a vise or something that you can rest only the fan inner ring on, while allowing the cutter or tool holder to pass the jaws of the vise. Using a dead blow or plastic hammer, carefully hammer the cutter or tool holder down to the desired depth. Do Not Use Metal Hammers.
For cutters the desired position is generally where the flutes stop and the solid round surface area is. To start an end mill or other spiral cutter, "screw" the cutter into the top of the fan internal ring to get it starts. For tool holders, the desired depth is the bottom of the tooling flange.
A word of caution. Keep anything you value away for the spinning fan blades. As with anything in the shop, make sure you use personal protective gear. In a nutshell, don't do dangerous or stupid stuff and take precautions.
This is our Temporary Website while we switch servers. Around August 11 our server went haywire for some reason. Anyway, the normal website should be up with 5 days days or so.

James Dimond
Mad Scientist & Engineer
Initially, we started building very specialized superchargers for performance applications. After buying some Sherline products, we pretty much found out that they are very much hobby grade products....but, had some potential. From there we built our own high-end headstocks, then motors and then did the same for Taig mills and lathes. Today we sell commercial grade equipment all over the world.
Contact Us: 269-743-1919
